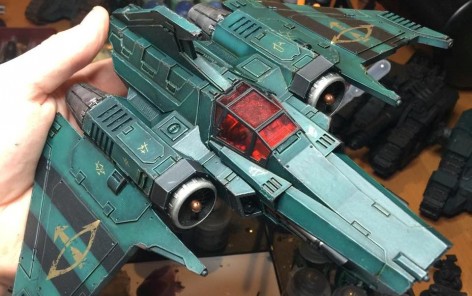
Come see what may be the BEST guide to painting the mysterious Sons of Horus green out there from SJP Painting!
This is an absolutely stunning and inspiring guide to painting the Sons of Horus. I am very excited to share it with you.
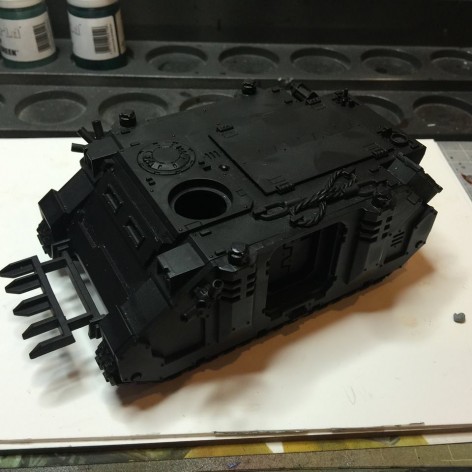
1. First and foremost, prime the model you wish to paint. I find black works best.
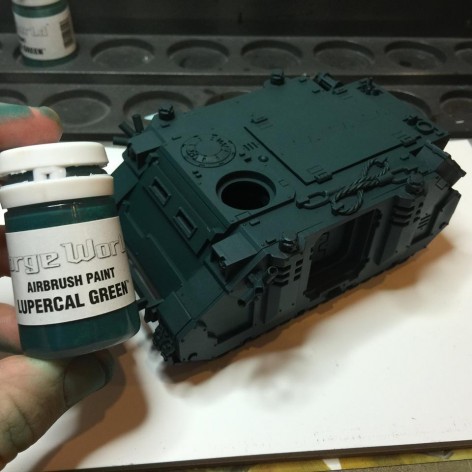
2. Apply ‘Lupercal Green’ from Forgeworld’s airbrush paint range to the entire model. This can be done with several layers by brush or by airbrush as shown in my photo.
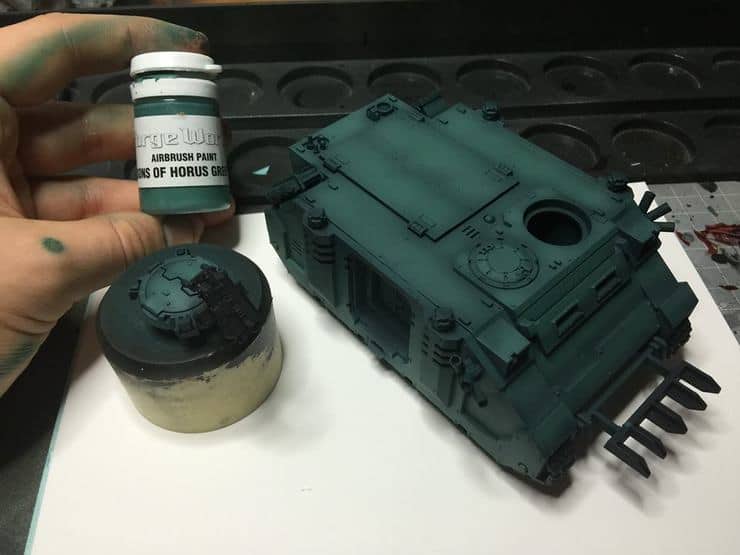
3. Next apply some shading with another paint from Forgeworld’s airbrush paint range, ‘Sons of Horus Green’. This has been done with an airbrush focusing more towards the edges of the armour panels.
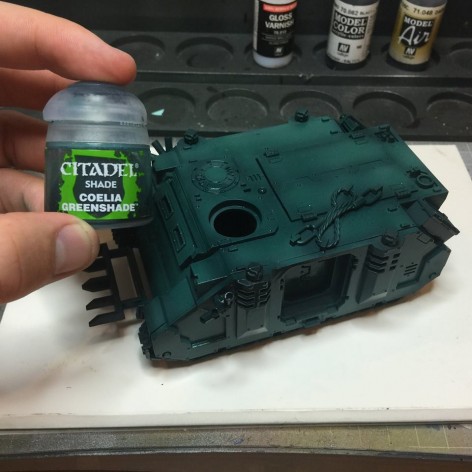
4. Next we blend the two greens together by giving the entire model a wash with Citadel’s ‘Coelia Greenshade’ shade. It is important you quickly apply several thin coats to avoid ‘pooling’ and tide marks across some of the flatter panels.
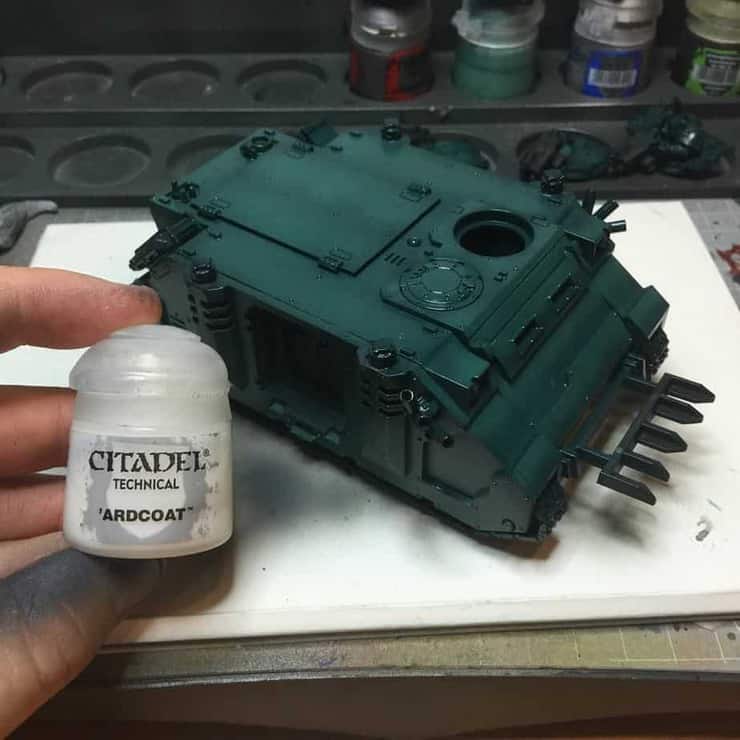
5. At this point the model is ready for its transfers to be applied. But before we do this the whole model is coated with Citadel’s ‘Ardcoat’ gloss varnish. This will allow your transfers to adhere to the model more easily and is essential for the next couple of steps.
6. Using ‘Micro-sol’ and ‘Micro-set’ apply your transfers to the model. These two chemicals help adhere the transfer far more efficiently than just using water. There are some great guides online for applying transfers using these two chemicals.
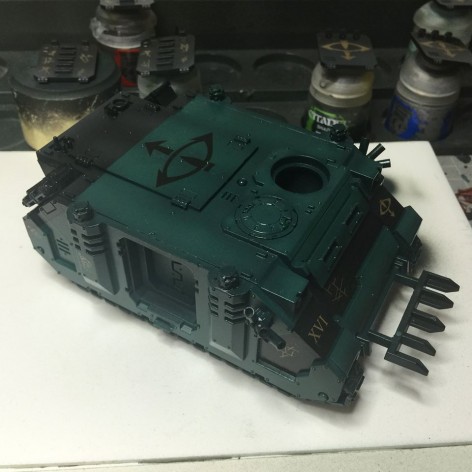
7. Next with the transfers in place, I apply Citadel’s ‘Agrax Earthshade’ into the recesses to give the panels more definition. Having the model still covered in gloss varnish will allow the shade to flow more easily into the recesses.
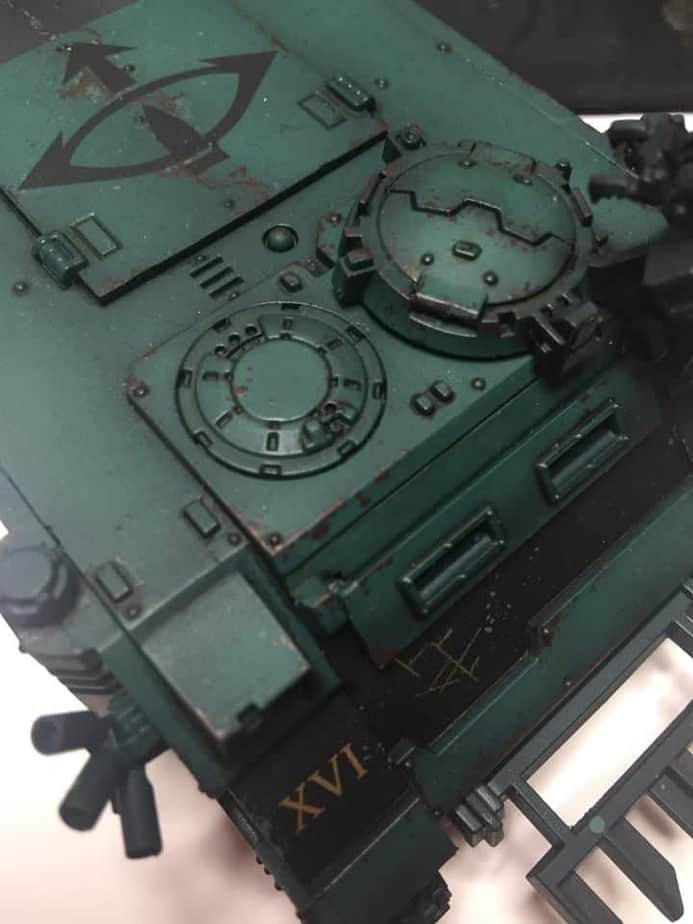
8. Now I use ‘Testors Dull Cote’ matt varnish to dull down the gloss and protect the model. Once this has dried I then sponge on Citadel’s ‘Rhinox Hide’ to the edges of the armour panels to create a worn and chipped effect.
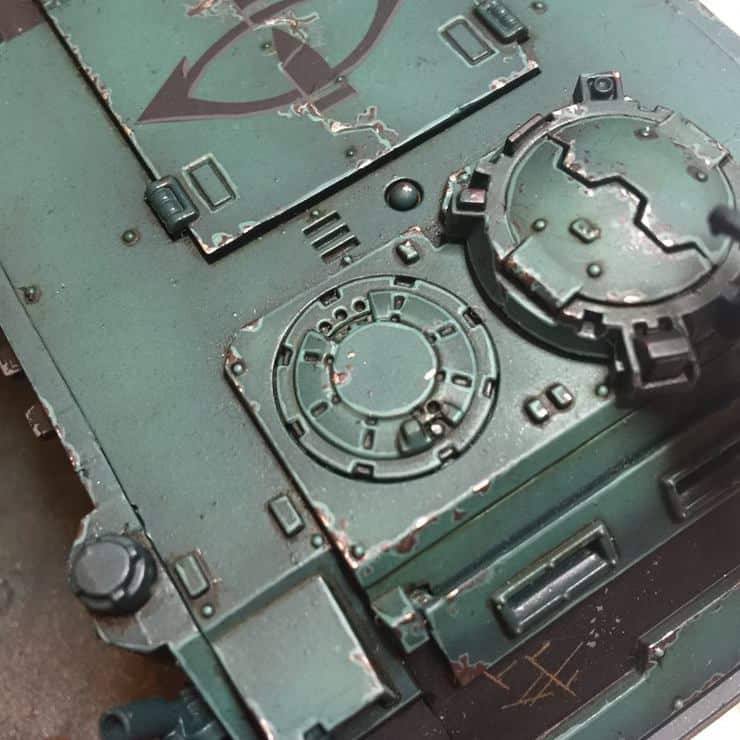
9. Lastly I apply Citadel’s ‘Leadbelcher’ to the deepest looking ‘chips’ to represent battle damage thats worn right down to the metal. To finish the green I then line highlight the armour panels with ‘Lupercal Green’ by brush to give both the chipping effect and panels more definition.
With the green completed, this allows you to move onto painting the model’s other details and any additional weathering!
Wow what an amazing realistic looking green that’s super easy to do when you have the right paints! If you liked that guide be sure to start following SJP Painting over on Facebook today!
SJP Painting
Maybe its time to checkout those FW paints after all…